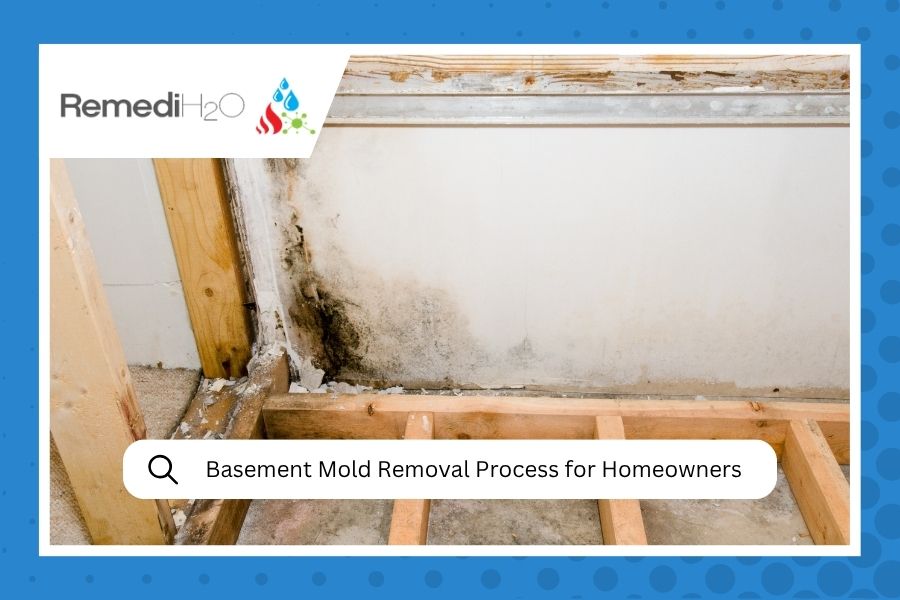
Basement mold is one of those problems that loves to hide. It grows quietly behind drywall, under carpet, and along concrete block walls long before you catch that musty smell. Here in Colorado’s Western Slope and Roaring Fork Valley, below-grade spaces face unique challenges: snowmelt seeping through foundations, humidity swings between seasons, and older homes built without vapor barriers. Our team at RemediH2O handles professional mold remediation in basements across Aspen, Glenwood Springs, Silt, Carbondale, and the surrounding region. This guide walks through the full remediation process so you know what’s involved, whether you’re calling a pro or just trying to understand what’s happening downstairs.
Why Basements Are Mold Magnets
Basements create near-perfect conditions for mold. They’re below grade, surrounded by soil that holds moisture year-round. Concrete and block walls are porous, so water vapor moves through them even without a visible leak. Add limited airflow and the organic materials most people store down there, cardboard, wood furniture, old carpet, and you’ve got a buffet for mold spores.
According to the EPA’s guidance on moisture in basements and crawlspaces, moisture intrusion from soil, condensation, and air infiltration are the leading causes of below-grade mold in residential homes. In mountain communities like ours, spring snowmelt adds another layer of risk. Mold can start colonizing within 24 to 48 hours of a moisture event, and by the time it’s visible, it’s often been growing for weeks.
Signs You Have a Basement Mold Problem
You don’t always see basement mold first. Sometimes you smell it, or notice health symptoms before you find the source. Here are the most common warning signs.
- Musty or earthy odor that gets stronger when you close the door or run the HVAC
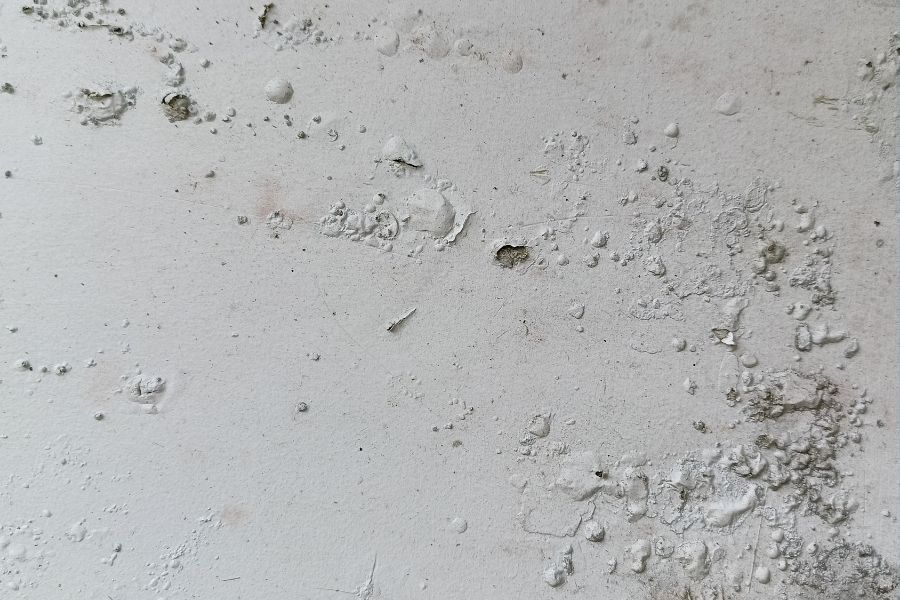
- Visible discoloration on walls, floors, or ceiling tiles; mold appears white, gray, green, black, or even orange
- Peeling paint or bubbling drywall, signaling moisture trapped beneath the surface
- Efflorescence (white chalky mineral deposits on concrete), indicating water moving through foundation walls
- Allergy or respiratory symptoms that improve when you leave home
- Water stains or rust streaks on foundation walls or around floor drains
Peeling paint and bubbling drywall are early red flags. Moisture trapped behind the surface lets mold take hold long before it’s visible from the outside.
If you’ve had a recent water event, a sump pump failure, burst pipe, or heavy rain flooding, check your basement carefully within the first 48 hours. For more on how mold develops after water damage, our post on how black mold forms after water damage covers the science behind the timeline.
Think You Have Basement Mold?
Don’t wait for it to spread. Our IICRC-certified team serves Aspen, Glenwood Springs, Carbondale, Silt, and the entire Western Slope with 24/7 emergency response.
The Basement Mold Removal Process: Step by Step
Professional mold remediation in a below-grade space follows a specific sequence. Each step matters. Skip one and you’re likely to see mold return within months.
Step 1: Assessment and Containment
Before anything is touched, the scope has to be established. Our techs inspect obvious surfaces and also behind finished walls, under flooring, and inside utility rooms. Once the extent is mapped, heavy plastic sheeting seals off the work area. Industrial air scrubbers with HEPA filters run continuously, creating negative air pressure that pulls mold spores into filtration rather than spreading them through the rest of the house.
Step 2: Personal Protective Equipment
Nobody enters an active remediation zone without proper protection: N-95 respirators at minimum (P-100 for heavy contamination), full Tyvek suits, nitrile gloves, and eye protection. The IICRC S520 standard for mold remediation specifies protection protocols based on contamination size and type, and we follow those standards on every job. For homeowners considering DIY work, this step is critical. Without proper gear, you’re exposing yourself to concentrated spores at the most dangerous point in the process.
Step 3: Removing Contaminated Materials
Porous materials with significant mold contamination can’t be cleaned; they have to come out. This is often hard for homeowners to hear, especially when it involves finished drywall, carpet, or insulation. Here’s a general breakdown of what typically stays versus what goes.
| Material | Typically Salvageable? | Reason |
|---|---|---|
| Concrete walls/floors | Usually yes | Non-porous; can be cleaned and treated |
| Drywall (moldy/damp) | No | Paper face absorbs mold too deeply to clean |
| Fiberglass insulation | No | Traps moisture and spores; always replace |
| Wood framing (surface mold) | Often yes | Can be treated if structurally sound |
| Carpet and padding | No | Retains moisture; mold penetrates too deeply |
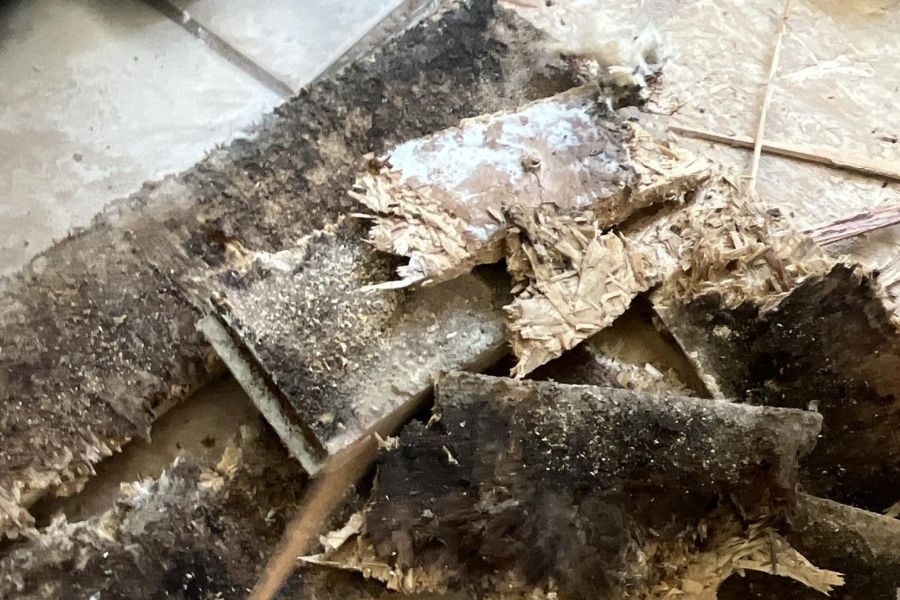
Contaminated porous materials are bagged and removed before any cleaning begins. Nothing unsealed passes through living areas.
Removed materials are double-bagged in heavy-duty poly bags and disposed of properly. Nothing unsealed passes through living areas.
Step 4: HEPA Vacuuming and Surface Cleaning
Every surface in the work area gets a thorough HEPA vacuum before any wet cleaning begins. This pulls surface spores off concrete, wood framing, and remaining materials. Skipping straight to chemical treatment just smears spores around. Surfaces are then cleaned with EPA-registered antimicrobial solutions, and wire brushing may come first on concrete to let treatment penetrate properly.
Step 5: Drying and Dehumidification
Getting visible mold off surfaces is only part of the job. The space has to be dried to a moisture level that won’t support regrowth. Our techs use commercial-grade dehumidifiers and air movers to bring relative humidity below 50% and wood moisture content below 16%, monitored with calibrated moisture meters. In a finished basement, this takes several days. For homeowners in Silt, Rifle, or Basalt dealing with spring snowmelt intrusion, this phase can’t be rushed.
Step 6: Antimicrobial Treatment and Encapsulation
Once surfaces are clean and dry, an antimicrobial treatment goes on. On wood framing, an encapsulant coating often follows, creating a barrier that seals microscopic residue and helps prevent future colonization. Containment stays in place until clearance is complete.
Step 7: Clearance Inspection and Documentation
The last step is a clearance walkthrough. We verify that all visible mold has been addressed and confirm moisture readings are within acceptable ranges. This documentation matters for insurance claims and your own records. If you’re navigating a claim, our guide on mold remediation insurance coverage on Colorado’s Western Slope is worth reading before your adjuster visit.
DIY vs. Professional Remediation
Not every mold situation requires a professional. A small patch on a concrete wall from a single drip can sometimes be handled by a homeowner with the right gear. But basement mold tends to escalate, and there are clear thresholds where DIY stops making sense.
When DIY might work:
- Affected area is under 10 square feet
- Mold is on a hard, non-porous surface like concrete or tile
- You can identify and fix the moisture source yourself
- No one in the home has respiratory conditions or mold sensitivities
When you need a professional:
- Mold covers more than 10 square feet, or you can’t tell how far it’s spread
- Mold is inside walls, under flooring, or in your HVAC system
- You’ve had a flood, sewage backup, or significant water event
- Mold has returned after a previous cleanup attempt
- You’re dealing with a sale, rental, or insurance claim requiring documentation
Our Carbondale hidden mold case study shows how a slow, unnoticed drip turned a finished basement into a major remediation project, and why early detection matters so much.
Keeping Mold Out After Remediation
Remediation solves the current problem. Prevention keeps it from coming back. Below-grade spaces need ongoing attention, especially in Colorado mountain communities where moisture conditions shift dramatically by season.
Post-Remediation Prevention Checklist
- Run a dehumidifier year-round; aim for 30 to 50% relative humidity
- Check sump pump operation before spring snowmelt season each year
- Inspect foundation walls and window wells after heavy rain or rapid snowmelt
- Don’t store cardboard or untreated wood directly on concrete floors
- Extend downspouts at least 6 feet from your foundation
- Ensure basement windows and doors seal properly against humid outdoor air
- Address any active water intrusion through our flood and water damage services before conditions worsen
Moisture control is the only real long-term answer. Fix the source, keep humidity in check, and you’ve addressed the root cause rather than treating the symptoms.
Dealing With Basement Mold on Colorado’s Western Slope?
RemediH2O’s IICRC-certified team is available 24/7 across Aspen, Glenwood Springs, Silt, Rifle, Basalt, and surrounding communities. Free estimates and direct insurance coordination included.
Call (970) 715-6990 or reach out online
Frequently Asked Questions About Basement Mold Removal
How long does basement mold remediation take from start to finish?
Most projects take between 3 and 7 days. Surface mold on concrete might be resolved in a day or two. A finished basement with mold inside drywall and insulation takes longer, especially when the drying phase runs several days before materials can go back in.
Can mold come back after professional remediation?
Mold can return if the moisture source isn’t fully addressed. Remediation removes existing mold; it doesn’t waterproof your foundation or fix a leaking pipe. Identifying and correcting the moisture source is part of the process. Ongoing humidity control is essential if you have a history of water intrusion.
Is basement mold dangerous to my family’s health?
Mold exposure can cause health effects ranging from mild allergy symptoms to serious respiratory issues, particularly in people with asthma or compromised immune systems. The CDC’s guidance on mold and health notes that even mold types not considered toxic can cause significant irritation in sensitive individuals. If anyone in your home has symptoms that improve when they leave, a basement inspection should be a priority.
Do I need to leave my home during basement mold remediation?
In many cases, you don’t need to fully vacate. Containment barriers and negative air pressure keep spores isolated to the work area. That said, if you have young children, pets, or family members with respiratory conditions, temporarily staying elsewhere is a reasonable precaution. Your remediation team can give specific guidance based on the contamination’s size and location.