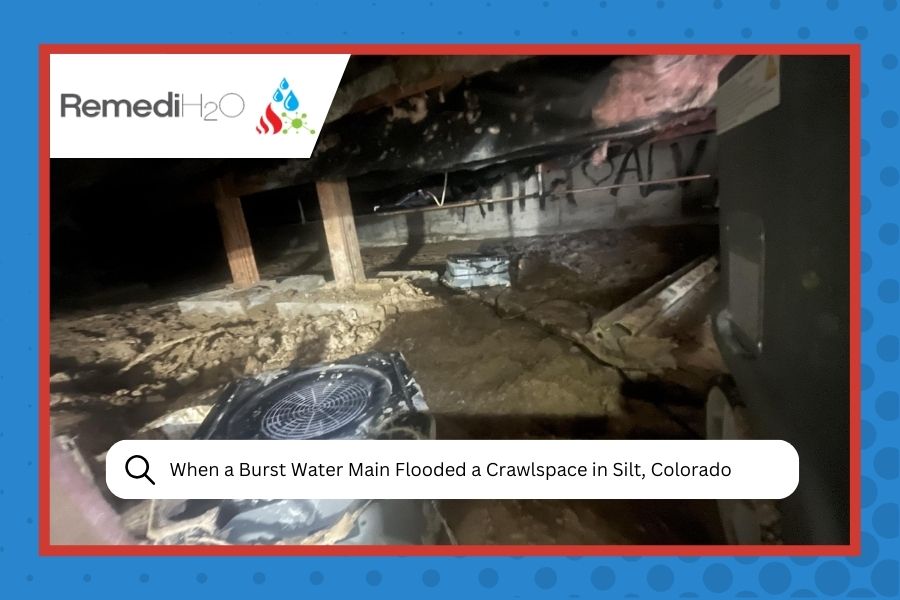
It was one of those cold November mornings in Silt when we got the call. A homeowner had noticed water seeping through their basement floor, and when they finally worked up the courage to check the crawlspace, well, let’s just say what they found wasn’t good. A burst water main had turned their crawlspace into something closer to a shallow pond, with nearly a foot of standing water covering everything.
When water damage strikes underground spaces like crawlspaces, homeowners often don’t realize the extent of the problem until it’s already serious. This was one of those cases, and we knew we had to move fast.
Assessing the Damage Below
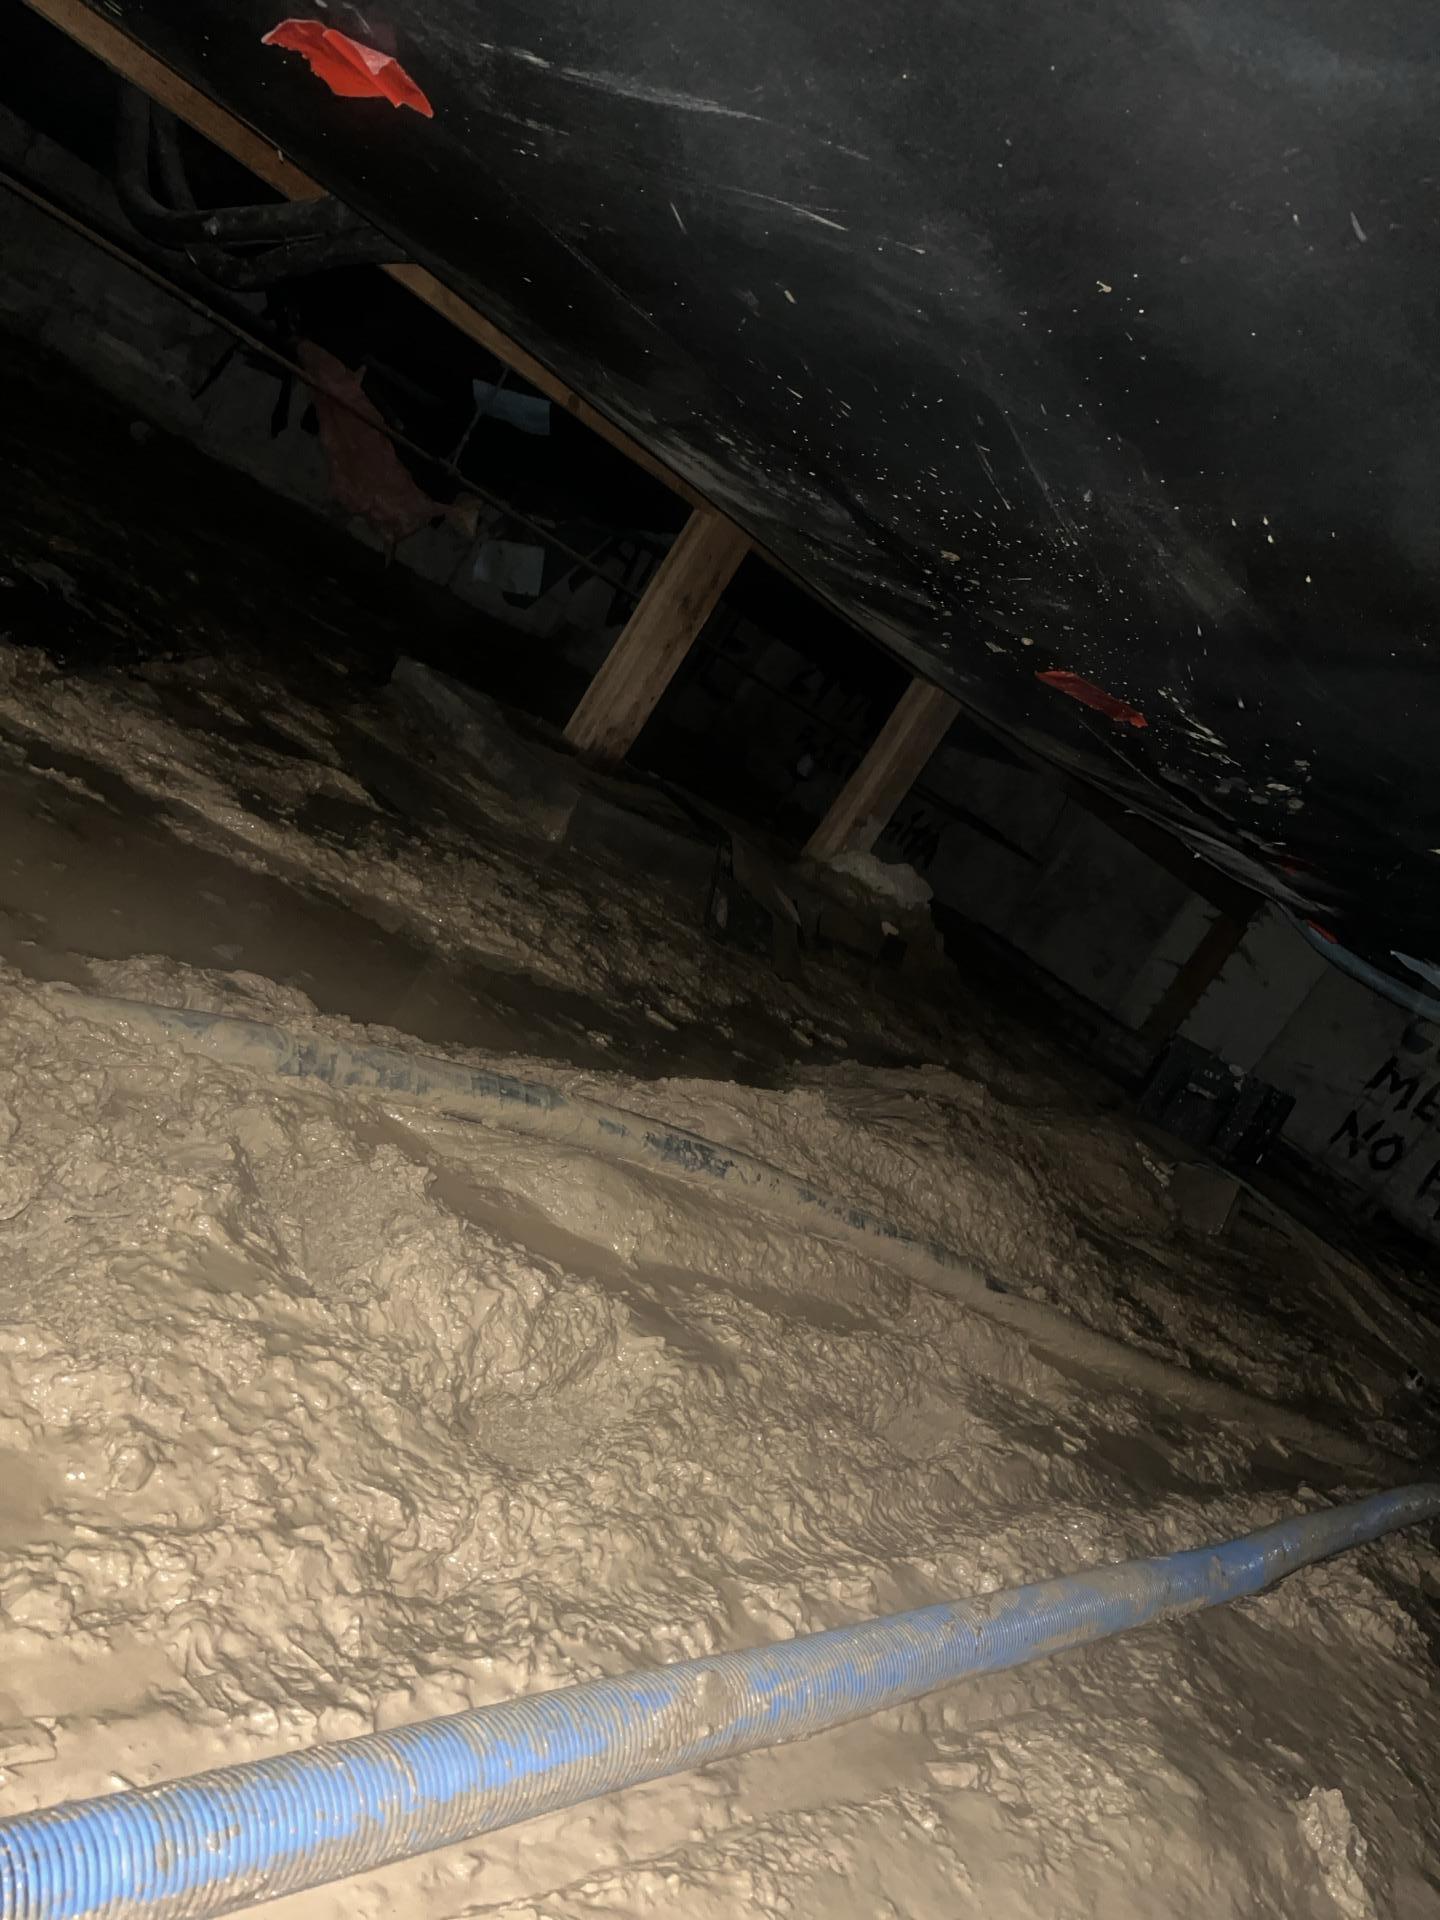
When our team at RemediH2O arrived, we suited up and crawled into the space to get a full picture of what we were dealing with. The photos we took told the story: saturated insulation hanging from the floor joists like wet sponges, a compromised vapor barrier that was doing absolutely nothing to protect the space anymore, and standing water as far as the light from our headlamps could reach.
The homeowner was understandably stressed. “Is my house going to be okay?” they asked. We’ve heard that question a hundred times, and our answer is always the same: with the right response and the right team, yes.
The Damage: What We Found

What Makes Crawlspace Water Damage Different
Crawlspace flooding is tricky because:
- Limited access makes extraction and drying more challenging than open basement spaces
- Poor ventilation means moisture lingers longer, creating ideal conditions for mold growth
- Insulation acts like a sponge, holding onto water and keeping everything damp
- Wooden structural elements are constantly exposed to moisture, risking rot and decay
According to the EPA’s guidance on moisture control, prolonged moisture in enclosed spaces is one of the primary contributors to serious mold issues. Time wasn’t on our side.
The Restoration Process: Bringing in the Big Guns
Step 1: Water Extraction with a Hydrovac System
With up to a foot of standing water, standard pumps weren’t going to cut it. We deployed our Hydrovac system, a powerful extraction tool that pulls large volumes of water quickly and efficiently. Think of it like a shop vac on steroids, designed specifically for disaster restoration work.
The process took several hours, but we methodically worked through every section of the crawlspace until the standing water was completely removed. Even then, we weren’t done. Moisture doesn’t just sit on top of surfaces, it soaks in.
Step 2: Drying Equipment and Monitoring
Once the visible water was gone, the real work began. We strategically placed industrial-grade air movers and dehumidifiers throughout the crawlspace to create airflow and pull moisture out of every material: the soil, the wooden joists, the concrete foundation walls.
But we don’t just set it and forget it. Our team uses moisture meters to track progress daily, checking readings in multiple spots to ensure we’re hitting industry-standard dry levels. We’re talking about getting materials back to their normal moisture content, the same levels they had before the water ever showed up.
Here’s what most people don’t realize: if you don’t dry things properly, you’re just setting yourself up for mold problems down the road. Mold can start growing within 24 to 48 hours in damp conditions, and once it takes hold in a crawlspace, it can spread to the rest of your home through your HVAC system.
Step 3: Removing Damaged Materials
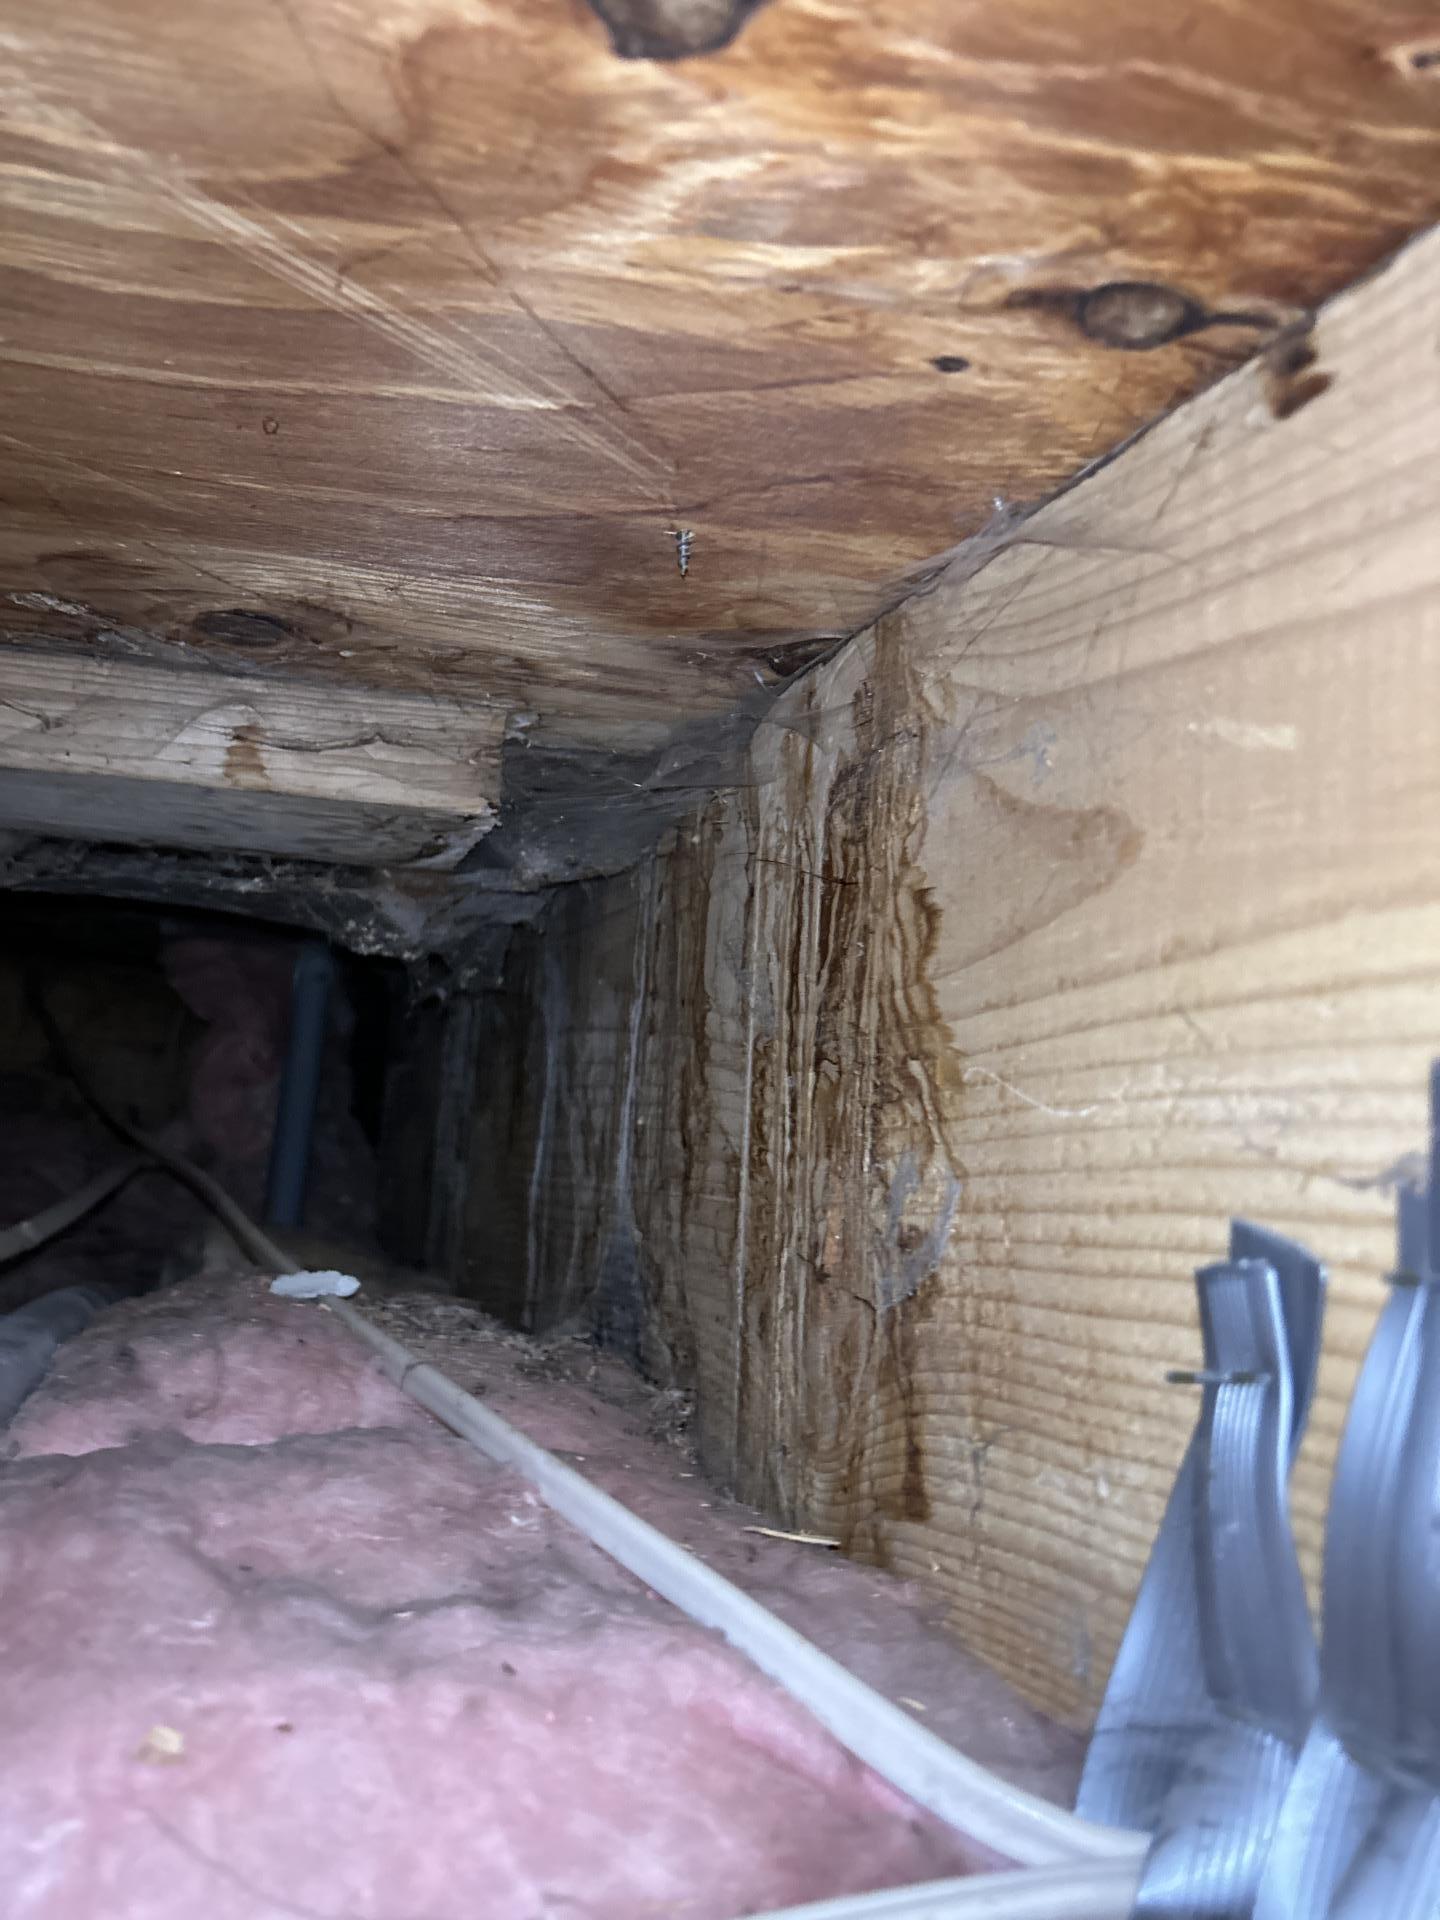
After the space was thoroughly dried, we removed all the compromised belly insulation. That fluffy pink stuff that’s supposed to keep your floors warm? Once it gets soaked, it’s done. It loses its insulating properties, holds onto moisture like a sponge, and becomes a breeding ground for mold and bacteria.
We carefully pulled it all out, making sure not to leave any remnants behind. It’s tedious work in a cramped space, but it’s essential.
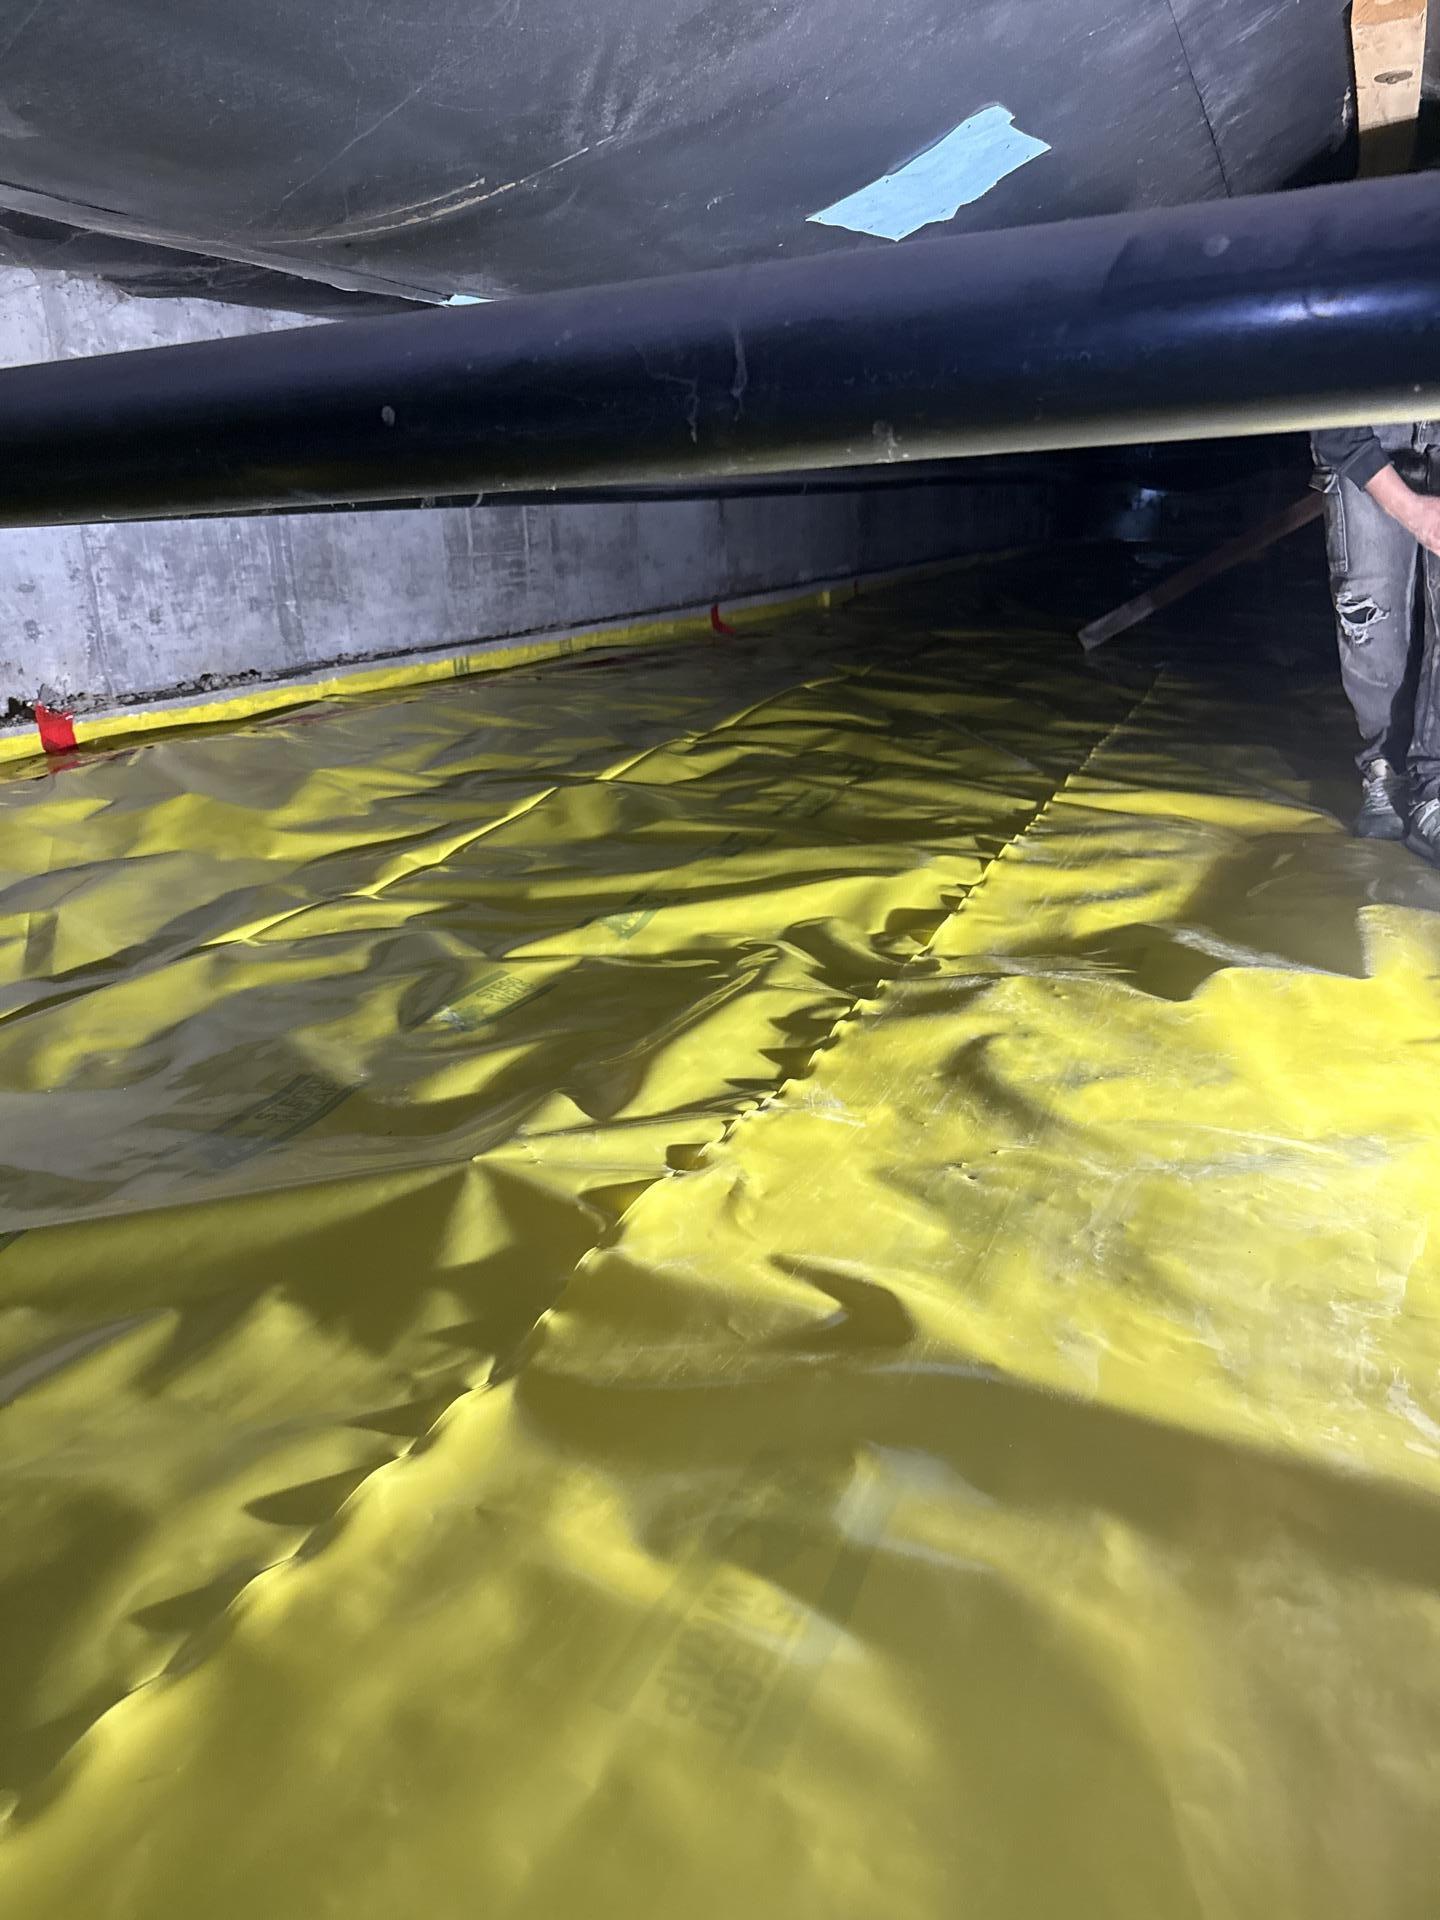
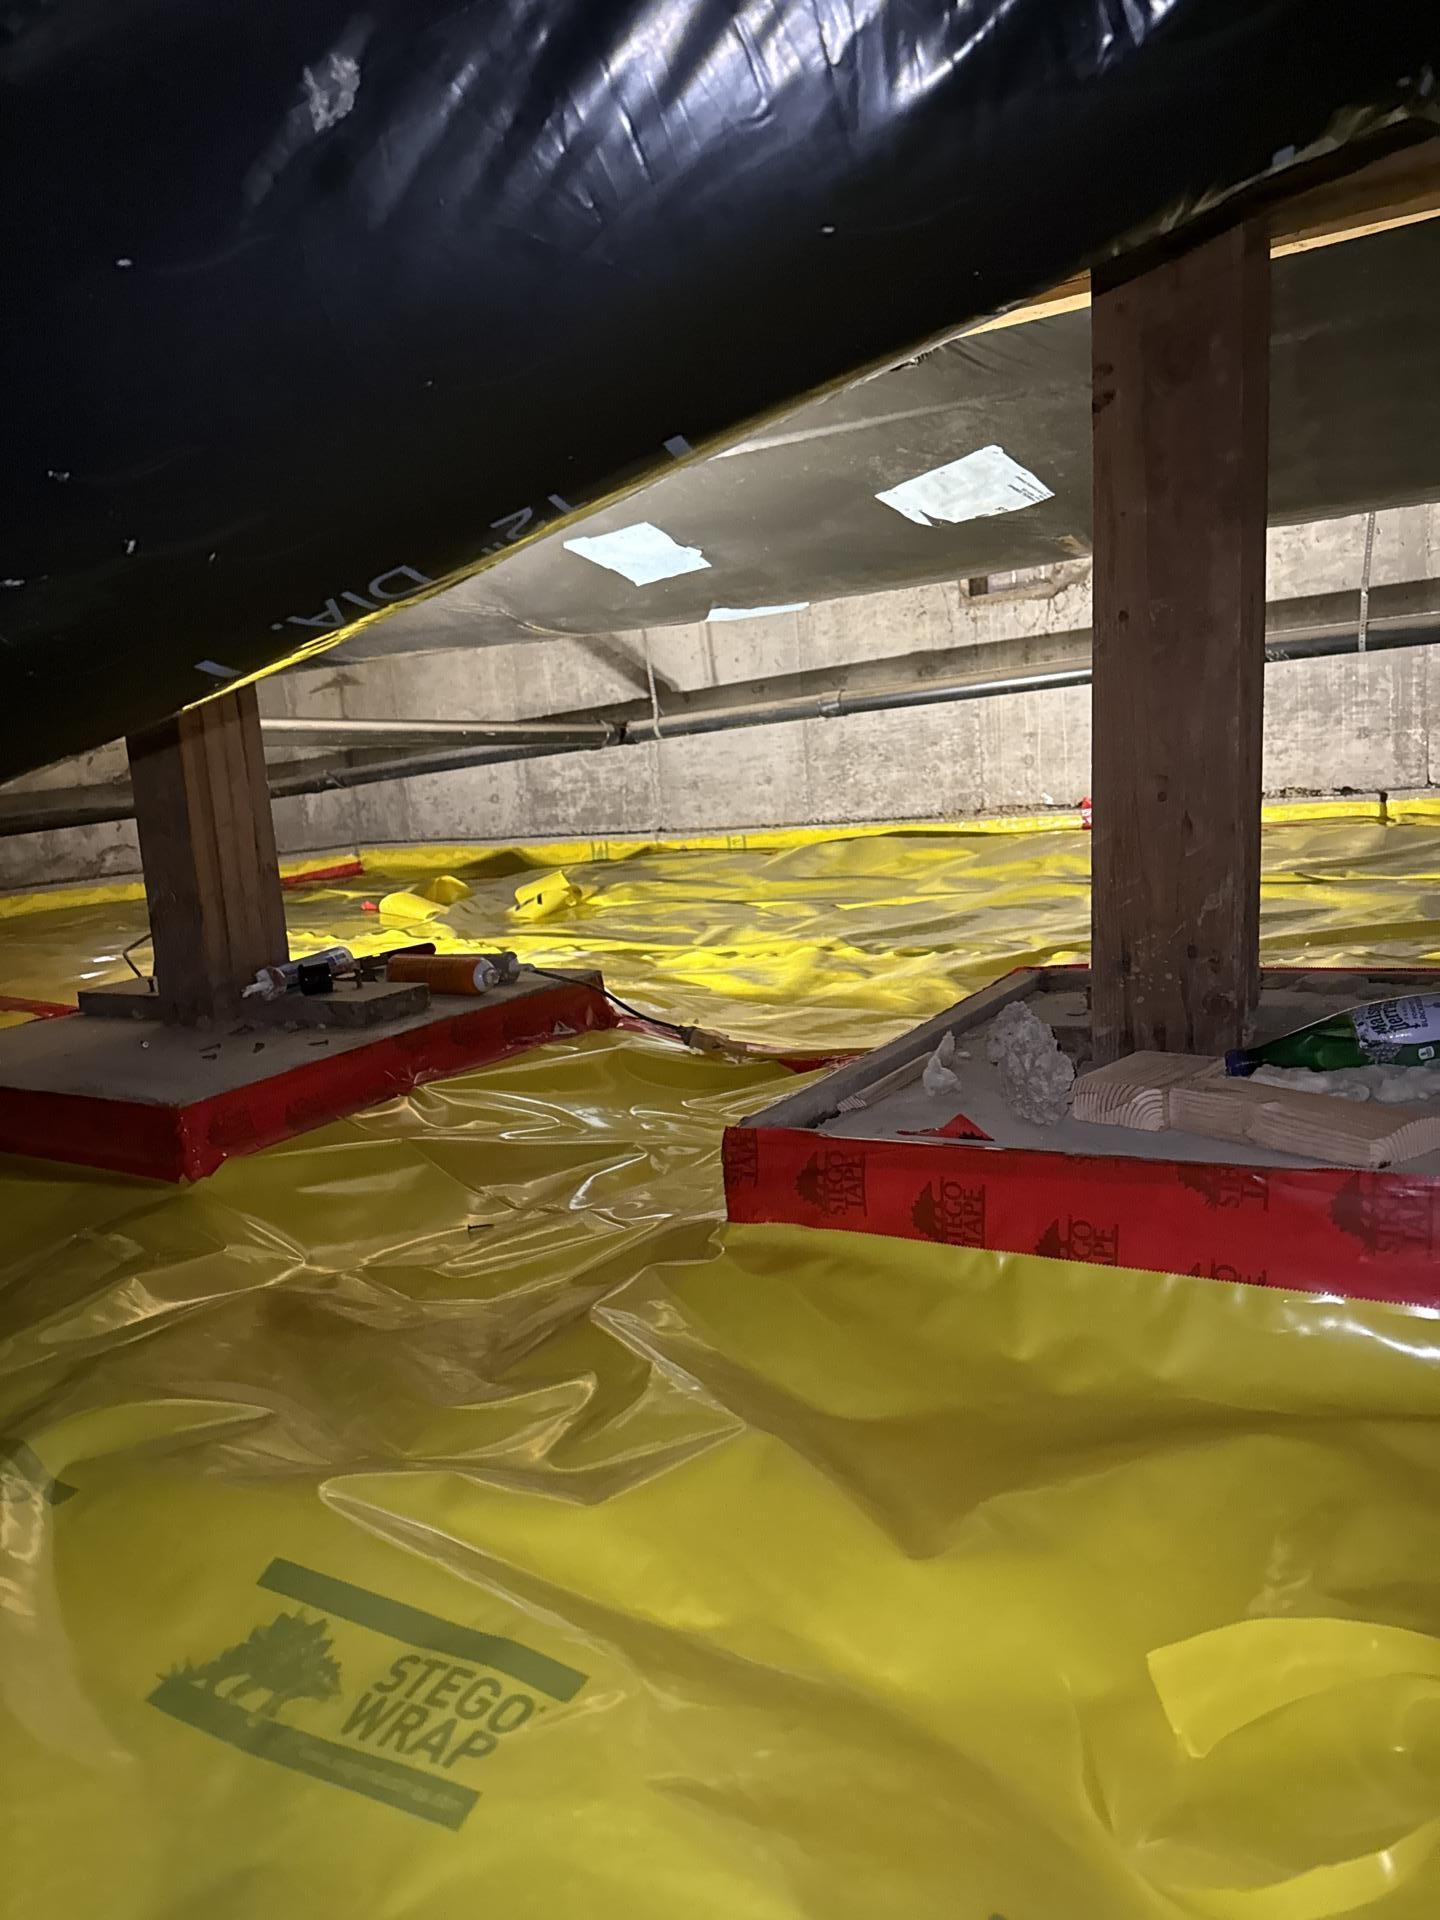
Step 4: Installing a New Vapor Barrier
The final step was installing a fresh vapor barrier across the entire crawlspace floor. This thick plastic sheeting acts as a shield between the damp ground and your home’s structure. It prevents ground moisture from evaporating up into the crawlspace, keeps humidity levels down, and protects your insulation and floor joists from future moisture issues.
We secured it properly, overlapping seams and taping everything down so it wouldn’t shift or tear over time. A good vapor barrier is your first line of defense against future problems.
The Transformation: Restored & Protected
Why Quick Response Matters in Water Damage Situations
This homeowner did the right thing by calling us immediately. In our years of handling water damage restoration in Silt and the surrounding areas, we’ve seen firsthand how much difference timing makes.
The longer water sits:
- The more structural damage occurs to wood and drywall
- The higher the risk of mold growth
- The more expensive the restoration becomes
- The greater the chance of secondary damage spreading to other areas
Quick action saved this homeowner from a much bigger headache. Instead of dealing with rotted floor joists, extensive mold remediation, or structural repairs, we caught it early enough to keep the damage contained.
Lessons from the Crawlspace
Every restoration job teaches us something, and this one was no exception. For homeowners in Colorado’s Western Slope, especially in areas like Silt where winter weather can wreak havoc on pipes and water mains, here are a few takeaways:
- Check your crawlspace regularly, especially after cold snaps when pipes are more likely to freeze or burst
- Know where your main water shutoff is and how to use it (seriously, this can save you thousands)
- Don’t wait to call for help if you notice signs of water intrusion, musty smells, or unexplained increases in your water bill
- Maintain your vapor barrier as part of routine home maintenance
The Final Result
By the time we packed up our equipment and left, the crawlspace looked completely different from when we first arrived. Dry, clean, and protected with new insulation and a proper vapor barrier. The homeowner could finally breathe easy knowing their home was safe and their investment was protected.
“I can’t thank you guys enough,” they told us as we wrapped up. “I had no idea what to do, and you made this so much easier than I thought it would be.”
That’s exactly why we do what we do.
When Disaster Strikes, We’re Here
Whether it’s a burst water main, a fire emergency, or discovering hidden mold in your crawlspace, our team at RemediH2O is ready to respond 24/7. We’ve seen it all, and more importantly, we know how to fix it.
If you’re dealing with water damage or just want to make sure your crawlspace is in good shape before winter really sets in, give us a call. We serve Silt, Aspen, Glenwood Springs, and all of Colorado’s Western Slope with the same level of care and expertise.
Because when your home is at risk, you deserve a team that treats it like their own.
Facing Water Damage? We’re Available 24/7
Don’t wait for water damage to get worse. Our certified restoration experts are standing by right now to help you protect your home and get your life back to normal.
Immediate Response
We answer calls 24/7 and arrive fast to minimize damage
IICRC Certified
Industry-leading training and 25+ years experience
Insurance Help
We work directly with your insurance to simplify claims
Serving Silt, Aspen, Glenwood Springs, Grand Junction & Colorado’s Western Slope